
It’s almost Halloween! In this tutorial I’ll show you how to make a glowing jack-o’-lantern in Procreate.
In order to follow this tutorial, you’ll need to start by drawing a pumpkin in Procreate. I recently wrote a tutorial showing how to do this. I recommend following the steps in that tutorial before starting this one. I used the pumpkin I created in that tutorial to write this one.
Watch the video or read the tutorial below:
What You’ll Need
- Finished pumpkin drawing
- iPad
- Procreate App
- Apple Pencil (Recommended)
Make the Pumpkin Darker
Make sure your pumpkin is on one layer, and you have a backup copy.
- If you followed our pumpkin tutorial, then you currently have a pumpkin group and a flattened pumpkin layer. You’ll use the flattened layer for this tutorial.
- If you make your own pumpkin make sure it’s flattened and on a single layer. (You may have to modify the colors in the tutorial to match your pumpkin.)
Duplicate the pumpkin and reduce the brightness and saturation
In order to make the glowing jack-o’-lantern more dramatic, we’ll need to darken the pumpkin a bit.
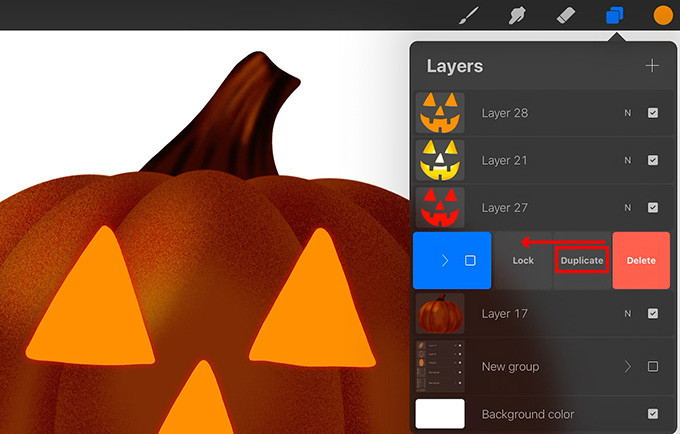
Swipe left on the flattened pumpkin layer and press Duplicate.

Now tap on the adjustments button and tap Hue, Saturation, Brightness.

Reduce the Brightness. Reduce the Saturation a bit as well. The darker your pumpkin is, the more dramatic the glowing jack-o’-lantern effect will be.

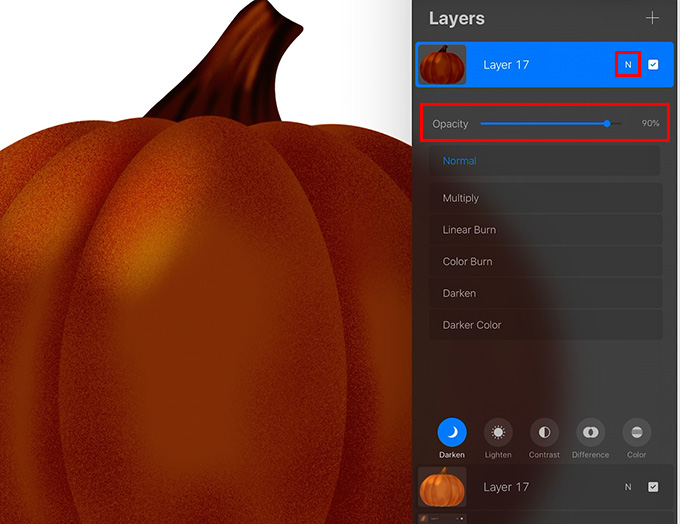
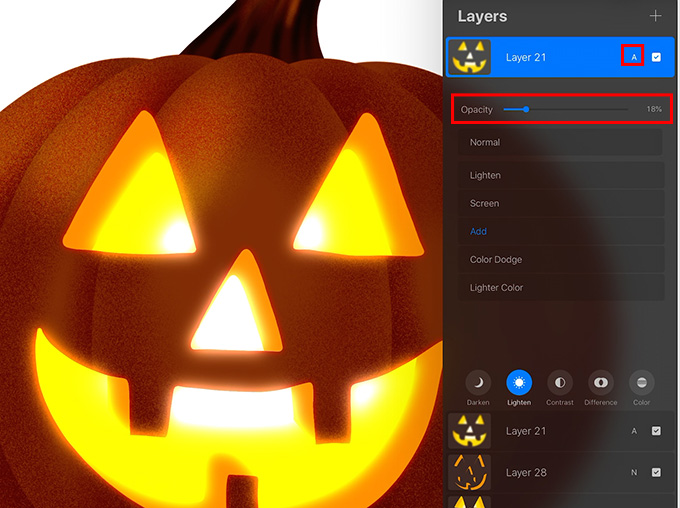
Reduce the opacity of the dark pumpkin layer
Now tap on the N on the dark pumpkin layer and reduce the Opacity a bit. I made mine about 90%.
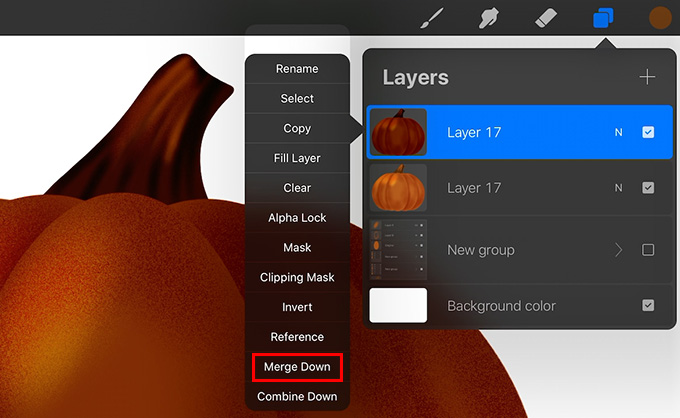
If you’re happy with how it looks, make sure you have a copy of your original pumpkin, then tap on the dark pumpkin layer and in the pop-out menu press Merge Down.
Now let’s add a face to the pumpkin.
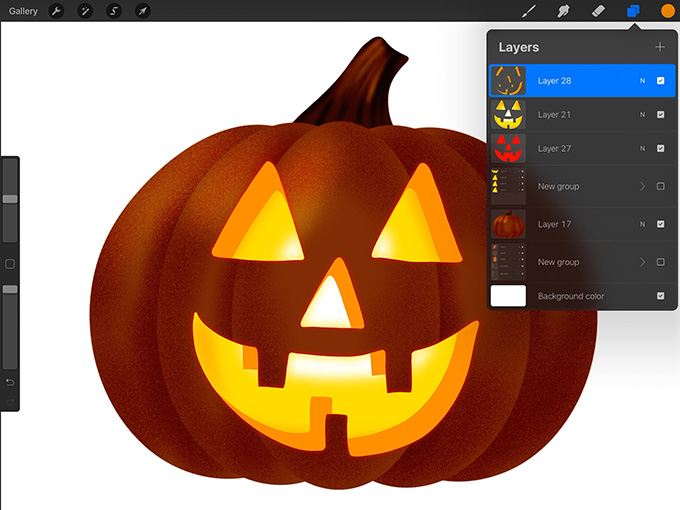
Draw a Face
Create a new layer above the merged pumpkin layer.
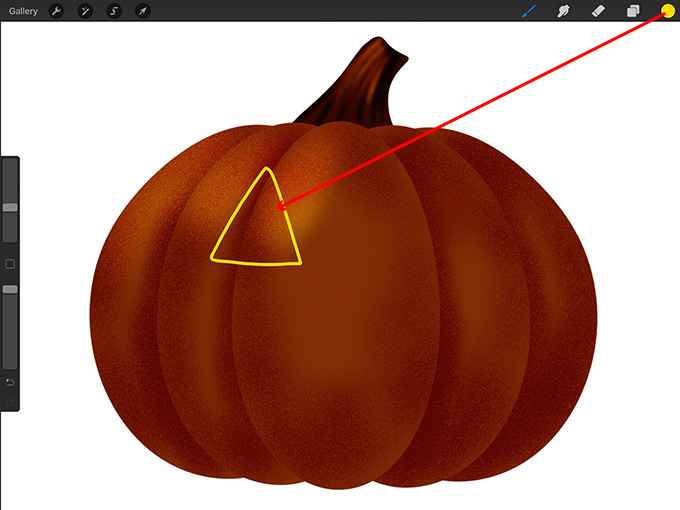
Tap on the color swatch and enter the Hexadecimal #ffdb00 to get a yellow color.

Get the Monoline brush. It doesn’t matter what size you use. I made mine 14%. Draw an eye on the pumpkin. Make sure the shape is closed, and then drag from the color swatch to fill the shape with yellow.
Create a new layer and draw the other eye. Repeat this process, adding the nose and mouth on separate layers.
Because they’re on separate layers, you can tap on the layer you want and move or resize the eyes, nose, or mouth.

Group the face layers
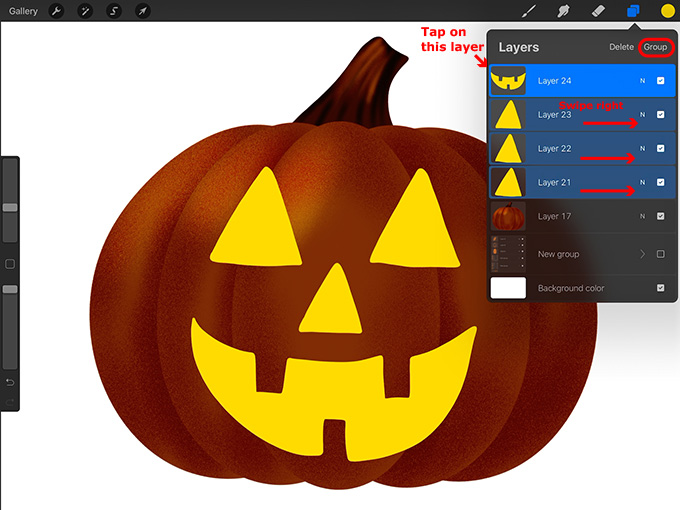
When you’re done, tap on the top face layer and swipe right on all of the layers below it. Then tap Group.
If you want to move the whole face, tap on the top New group layer, tap on the arrow and move the face. If you want to resize the face, tap Uniform at the bottom of the screen to resize it proportionally.
When you’re done modifying the face, tap on the small arrow beside New group to collapse the group. Then swipe left on the New group layer and press Duplicate. Turn off the visibility checkbox for the original face group. Then tap on the duplicated face group and press Flatten.

Add some white to the face
Let’s add some more color to the face as if there’s a candle inside of the jack-o’-lantern.
Tap on the flattened face layer and in the fly-out menu press Select.

Create a new layer above the face.
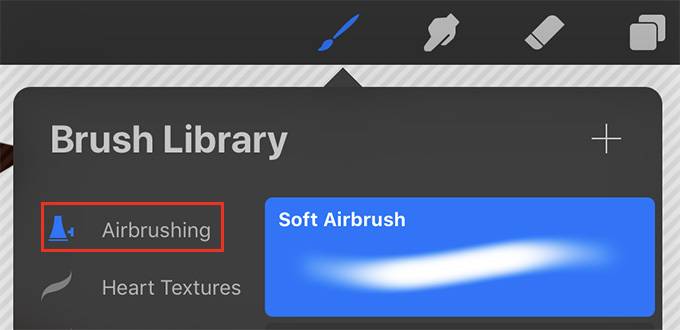
Get the Soft Airbrush located in the Airbrushing set. I made the size about 24% and the opacity 100%. Use a size that works for your pumpkin.
Tap on the color swatch and enter the Hexadecimal #ffffff to get white.
Paint a bit of white in the eyes, nose, and mouth. I added white to the inner corner of the eyes, the top of the mouth, and the nose.

Add a yellow orange color
Now tap on the color swatch and enter the Hexadecimal #ffb300 to get an yellow orange color. Paint some of this in the eyes, nose, and mouth. I added this color to the sides of the eyes and the sides and bottom of the mouth.

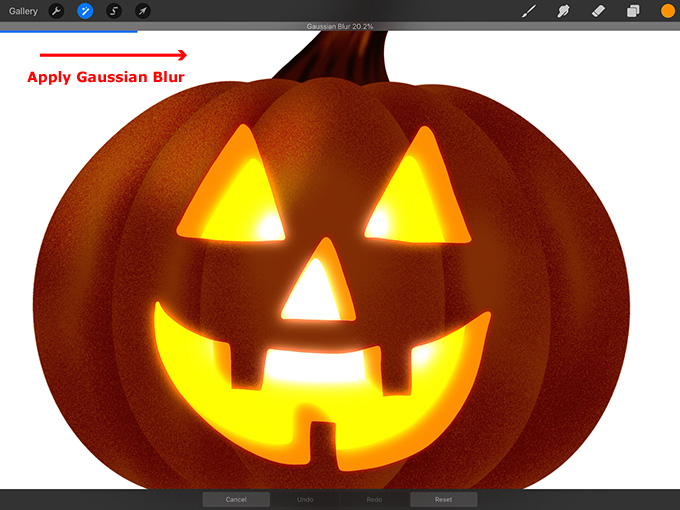
Create a gradient
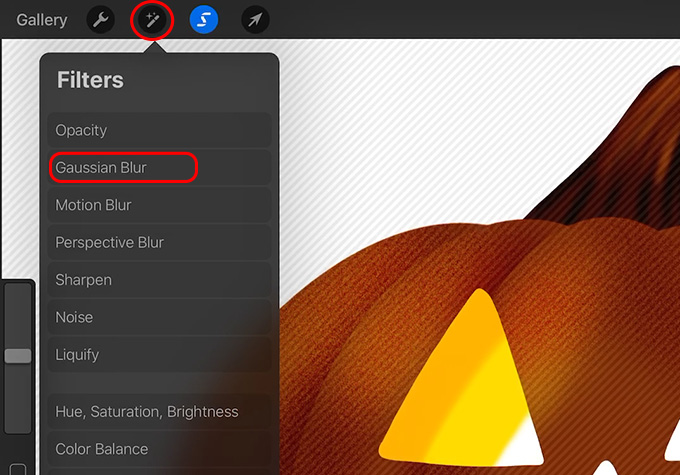
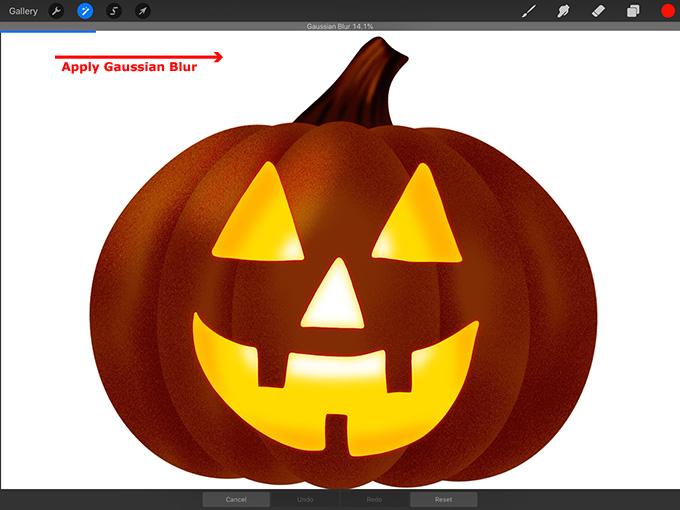
With the face still selected, tap on the adjustments button and press Gaussian Blur.
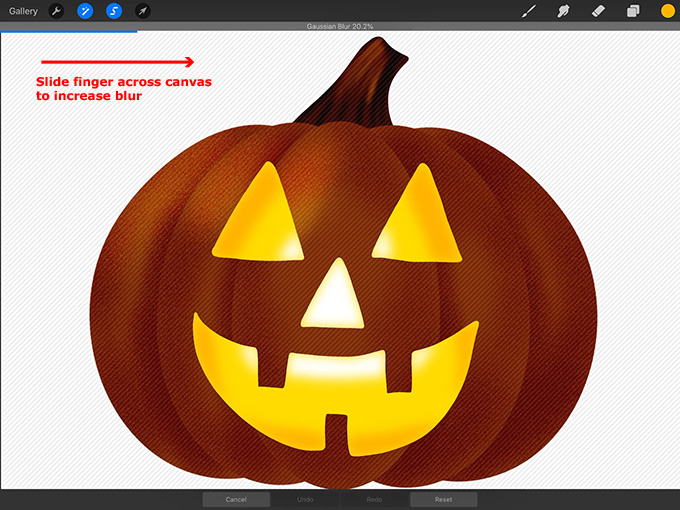
Blur the colors until they seem to blend into a gradient. I slid the blur until it was about 20%.
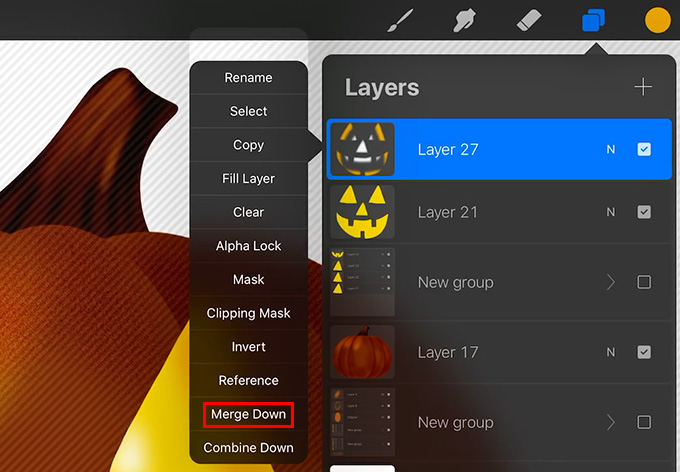
Now tap on the gradient layer and in the fly-out menu press Merge Down to merge it with the face layer.
Carve the Pumpkin
Now let’s make the face appear to be carved.
Create an outline around the face
Tap on the face layer and in the fly-out menu press Select.

Create a new layer.
Get a red color, Hexadecimal #ff1100.
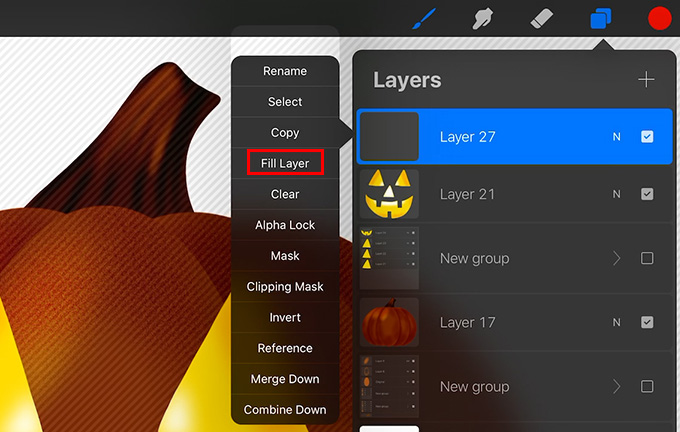
Tap on the new layer and press Fill Layer to fill it with red.
Now tap and hold on this layer until you can move it underneath the yellow gradient face layer.

Tap on the adjustments button and tap Gaussian Blur. Increase the blur to create a slight red outline around the face. I made mine about 14%.
Add an orange layer
Tap on the yellow gradient face layer and in the fly-out menu press Select.

Create a new layer above it.
Get a bright orange color, Hexadecimal #ff9000.
Tap on the new layer and press Fill Layer.

Duplicate the face group
Swipe left on the original face group layer and press Duplicate.
Move the duplicated group layer to the top of the layer stack. Tap on the small arrow next to the group to expand it.
Move the face so you can see the orange underneath
Tap on the first eye layer.

Then tap on the arrow and move the eye until you can see the orange underneath it. This is the carved area that will be shown. The more that is shown, the deeper the carving will be. You can also resize the eye if you want to show more of the carving. I moved the eye down and to the right.

Now repeat this process for each of the face layers. I moved the right eye down and to the left. I moved the nose down and to the left. I moved the mouth up and to the left.
Create the carved area
When you’re happy with how the carvings will appear, tap on the top New group layer and press Flatten.

Now tap on the top face layer and press Select.

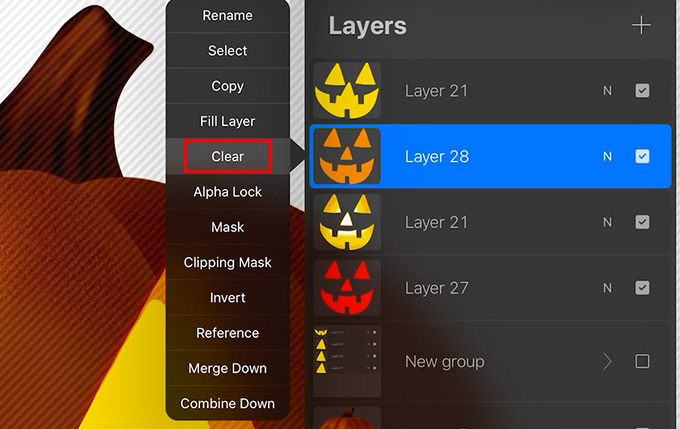
Then tap on the orange face layer and press Clear. This will clear the yellow selection from the orange layer leaving just the carved orange areas.
Swipe left on the top yellow face layer and press Delete.

Now the face should appear carved.
To fix up the carvings, tap on the yellow gradient face layer and press select.

Then tap on the orange carved layer.
Get the Monoline brush and paint in areas that don’t look right. For instance, I made the orange connect with the teeth so it looked cut out. You can also erase any orange areas that you don’t like.
TIP: If you want to zoom in, pinch out with two fingers on the screen. Pinch inwards with two fingers to zoom back out.

Make the Face Glow
Swipe left on the yellow gradient face layer and press Duplicate. Move the duplicated layer above the orange carved layer.
Tap on the orange carved layer and press Select.

Then tap on the top yellow gradient face layer and press Clear. This will cut the top yellow gradient face layer down so that it fits within the carved area.

Turn off the visibility checkboxes for the orange carved layer, the original yellow gradient face layer, and the red layer.

There’s a slight line around the face that didn’t clear. To erase it, tap on the eraser and choose a brush. I used the Soft Airbrush eraser located in the Airbrushing set with the opacity at 100%. You may need to decrease the brush size to erase small areas. I started with the size at about 19% and reduced it to about 9% to get some smaller areas. If you accidentally erase a bit of the face on this layer, it’s okay because it’s going to be blurred in a second.

Now turn the visibility checkboxes back on for the orange layer, the original yellow gradient face layer, and the red layer.
Tap on the N on the top layer, tap Lighten, and then tap Add.

Now tap on the adjustments button and press Gaussian Blur. Increase the blur until you like how the glow looks. I made mine about 20%.
If you want the glow to be even brighter, you can duplicate this blurred layer and then reduce the opacity of the duplicated layer until you like the look of it.
Add Some Texture
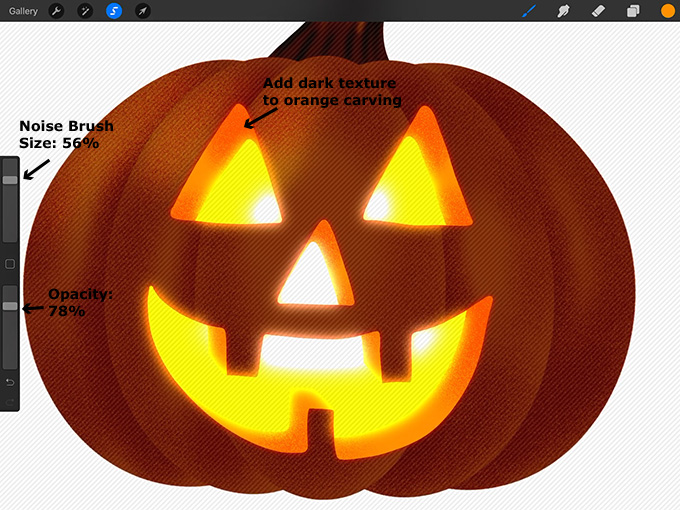
Add dark texture to carved area
Now let’s add some dark texture to the orange carved layer.
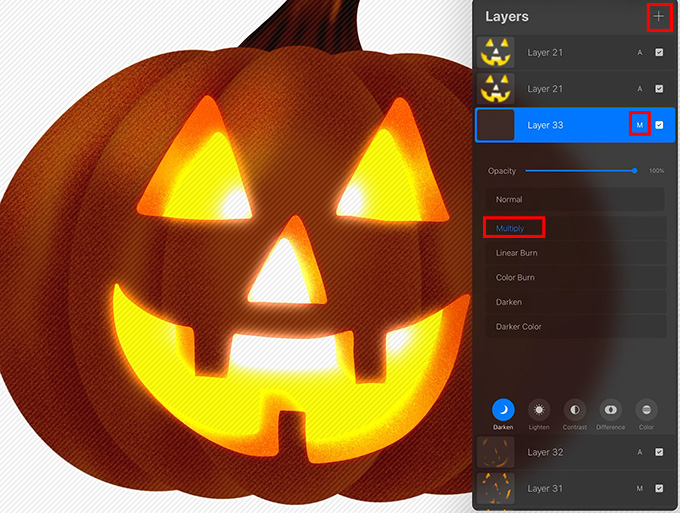
Tap on the orange carved layer and press Select.

Now create a new layer above it. Tap on the N on the new layer and then Multiply.
Get the Noise Brush located in the Touchups set.

I made the size 56% and the opacity 78%.
Paint some dark shading in the corners of the orange carved area using the bright orange color (#ff9000).
Add light texture to the carving
With the orange carved area still selected, create a new layer above the dark texture layer. Tap on the N on the new layer, tap Lighten, and give it the Add blend mode.
Now tap on the paintbrush and paint some light texture on the orange carved area. If your glow is very bright, it might be difficult to see the texture. If you want the texture to be more obvious, reduce the opacity of the glow layers.

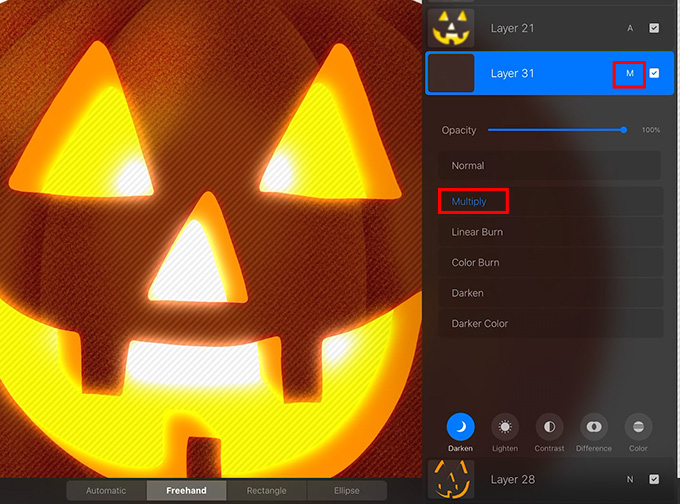
Add a line inside the carving
If you want to add a line inside the carving, with the orange carved layer still selected, create a new layer on top of the texture layers. Tap on the N on this layer and tap Multiply.
Get the yellow orange color, Hexadecimal #ffb300 and the Monoline brush. Make the size of the brush the lowest it will go, 1%.
Draw a line on the orange carving, between the carving and the yellow glow.

If you want the line to be less obvious, tap on the M on the line layer and reduce the opacity. If you want the line to be darker, you can swipe left on the line layer and press Duplicate. Then tap the M on the duplicated layer and decrease the opacity of the duplicated line.
We’re done with the jack-o’-lantern face! Now let’s add some finishing touches to the pumpkin.
Finishing Touches
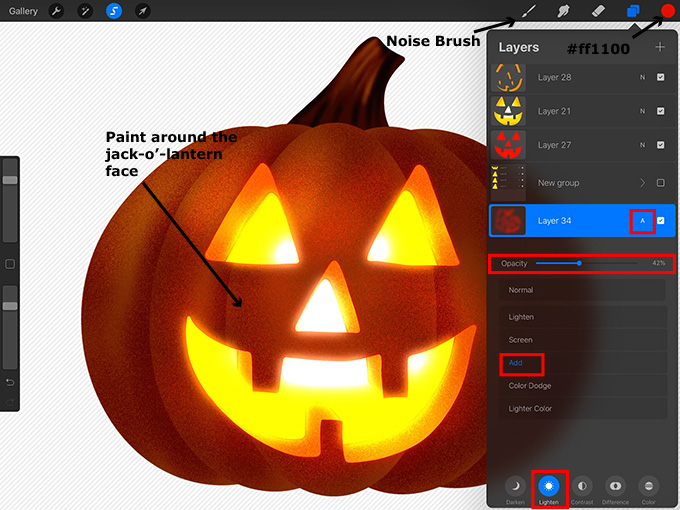
Add a red glow to the front of the pumpkin
Tap on the flattened pumpkin layer and press Select.

Create a new layer above it.
Get the red color, Hexadecimal #ff1100.
Get the Noise brush from the Touchups set. I kept the size at 56%.
Paint some red texture around the carved area on the front of the pumpkin.
Tap on the N on the red texture layer and change the blend mode or reduce the opacity until you like how it looks. I gave it the Add blend mode and reduced the Opacity to 47%.
Make the pumpkin glow
With the pumpkin still selected, create a new layer and drag it underneath the flattened pumpkin layer.

Get a color for the glow. I used the orange color that I drew the pumpkin with, Hexadecimal #c36624. Tap on the new layer and press Fill Layer.
Tap on the adjustments button and tap Gaussian Blur. Increase the blur until the color blurs behind the pumpkin making it seem to glow. I made my blur about 40%.

Now tap on the N on the glow layer and reduce the opacity of the glow until you like how it looks. I reduced it to about 88%.
Add a background
Create a new layer and drag it underneath the pumpkin glow layer.

Get a dark color, such as a dark blue (#07041a) or black (#000000). Then drag the color onto the canvas to fill the background.
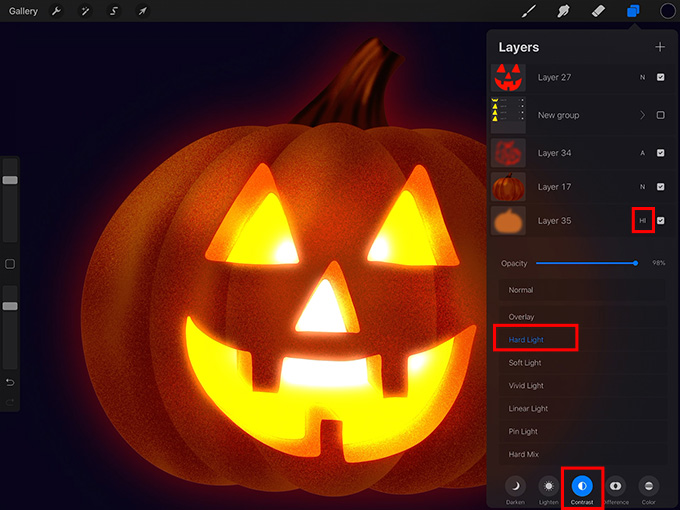
Change the blend mode of the glow layer
If you want, you can change the blend mode of the pumpkin glow layer. Tap on the N on the pumpkin glow layer directly above the background layer and choose a blend mode. I tapped Contrast and then Hard Light. This made the pumpkin glow have a reddish color. If you want, change the opacity of the glow so it looks nice with the blend mode you chose. I increased mine to 98%.
Get Creative
Add different colors to your background and blur them together to create a gradient or draw a background.
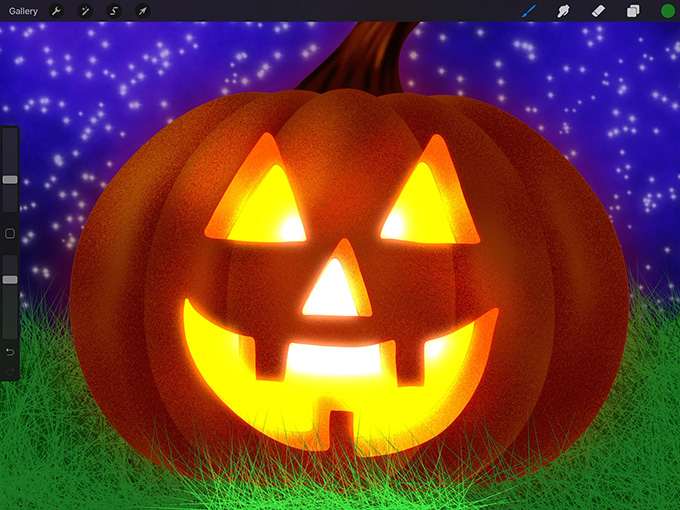
Here I used a blue gradient for the background and then painted the sky with the Nebula brush and a modified Glimmer brush from the Luminance set. I created the grass using a modified Spicule brush from the Abstract set. I made the grass glow a bit by applying the Add blend mode to it.
Make more pumpkins with different faces. Have fun and Happy Halloween!

Thank you!
Thanks for visiting mapletreemakery.com. We hope you enjoyed this tutorial! Come back often for more information and tutorials.


Leave a Reply