
Last year I made a blog post explaining how to make a heart stamp brush in Procreate. The process has changed a bit since the Procreate update. In this post, I’ll show you how to draw a symmetrical heart and make it into a heart stamp brush in Procreate 5. I’ll also show you how to make it a multicolor stamp brush.
Let’s make the brush!
Watch the video or read the blog post below:
What You’ll Need:
Procreate 5
iPad
Apple Pencil
Create a New Canvas
Tap on the (+) and tap on Square to create a new square canvas.

Prepare to Draw the Heart
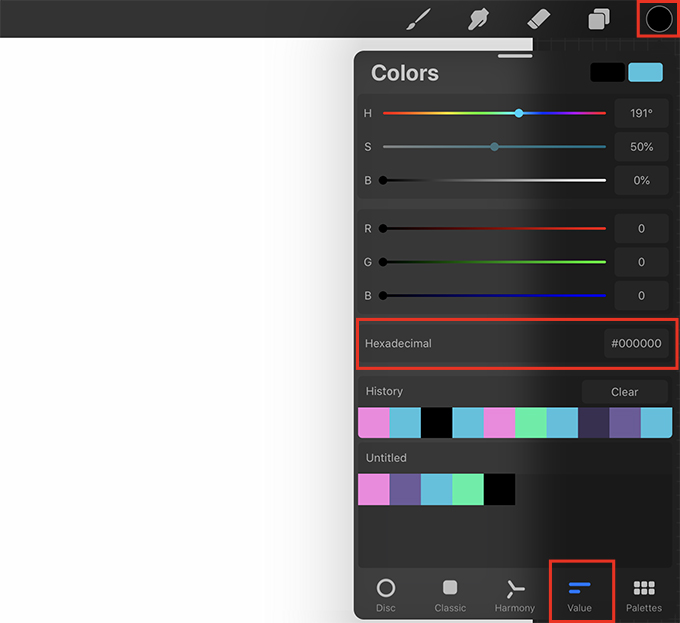
Get black for the color
Tap on the color swatch, tap Value at the bottom of the Colors menu, and enter the Hexadecimal #000000 to get black for the color.
Get the Monoline brush
Tap on the paintbrush icon and get the Monoline brush from the Calligraphy set.

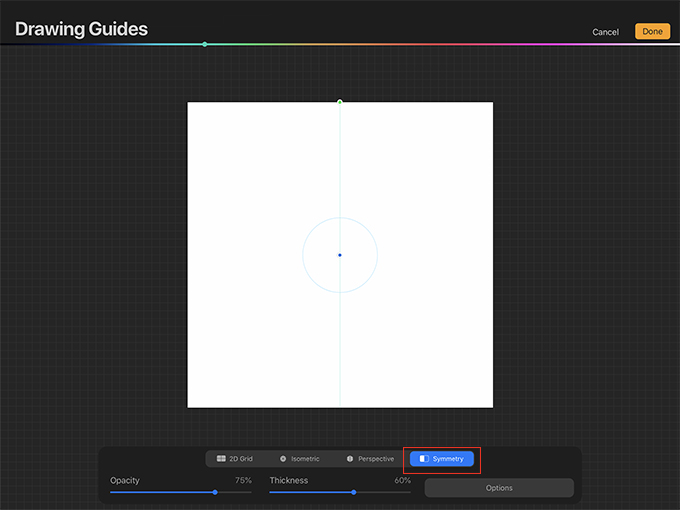
Turn on symmetry
Tap on the wrench, tap Canvas, and toggle the Drawing Guide on. Then tap Edit Drawing Guide.

At the bottom of the Drawing Guides menu tap Symmetry.
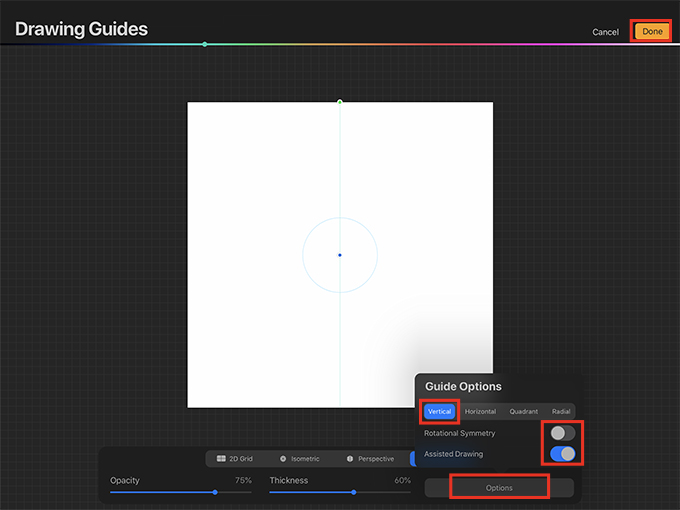
Tap Options. Vertical should be selected. Rotational Symmetry should be off. Assisted Drawing should be on. When the Guide Options look okay, tap Done in the upper right corner of the screen.
Draw the Heart
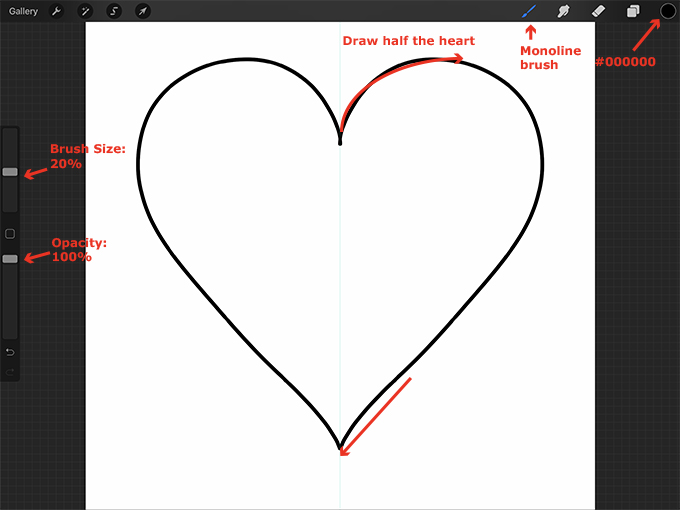
Use the sliders on the side of the screen to set the size and opacity of the brush. I made the size 20%. Make sure the opacity is 100%.
Start in the middle of the canvas and draw half of the heart. I started in the upper middle and drew the top of the heart first. As you draw, the other half of the heart should appear on the canvas.
Move and resize the heart
The heart should be large and in the center of the canvas. If you need to, tap the arrow and move the heart to the center of the canvas. You can also tap Uniform at the bottom of the screen and drag the nodes to resize the heart proportionally.

Make the Brush
Copy the canvas
Tap on the wrench, tap Add, and then tap Copy canvas.

Create a new brush set and a new brush
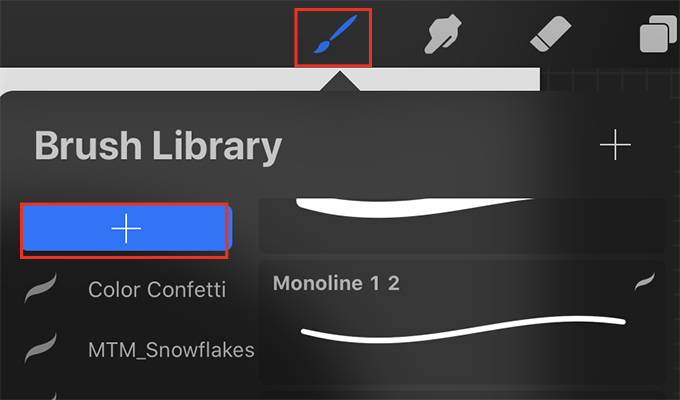
Scroll way up to the top of the Brush Library and tap on the (+) to create a new brush set. Give it a name such as “Hearts.”
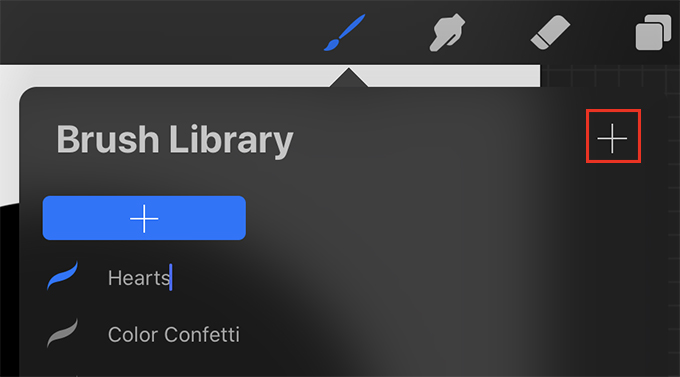
Tap on the (+) in the upper right corner of the Brush Library to add a brush to this set.
Heart Shape
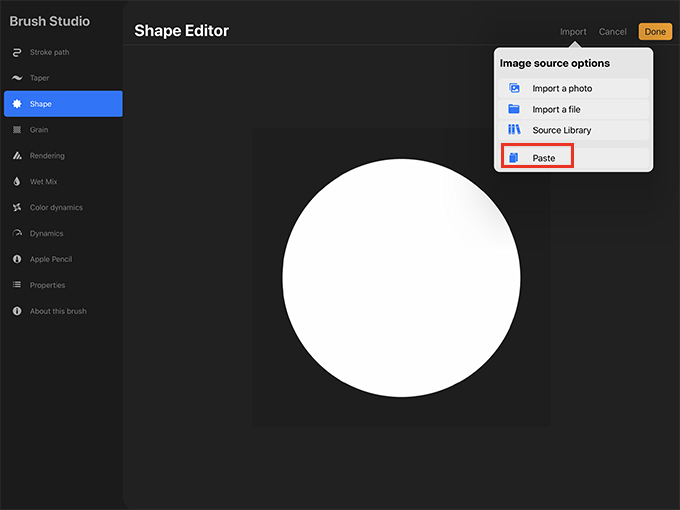
Tap Shape in the left side of the Brush Studio. Next to Shape Source tap Edit.

Tap Import and then Paste to paste the canvas.
Tap two fingers on the heart shape to invert the shape.
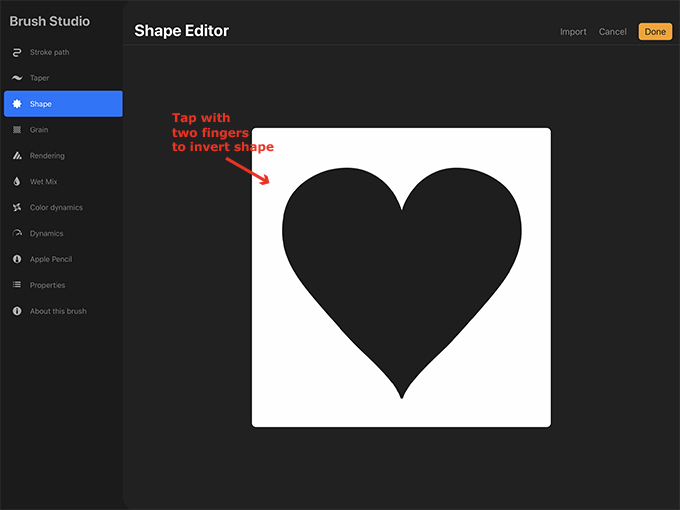
The background should be black and the heart should be white. When you’re done, tap Done in the upper right corner of the Shape Editor.

Stroke settings
Tap Stroke path. Increase the Spacing. I’m going to make mine Max.

Apple Pencil
Tap Apple Pencil. Right now, the opacity of the heart will change with the Apple Pencil pressure. I want the opacity to remain consistent, so decrease the Opacity to None.

Properties
Tap Properties. Under Brush behavior increase the Maximum Size. This is how large the brush can be. I’ll make mine about 673%. Increase the Minimum Size a bit as well. This is how small the brush can be. I’ll make mine about 11%.

Color dynamics (optional)
The stamp brush is done, but if you want to make the color of the brush change each time you stamp it on the canvas, tap Color dynamics.
Under Stamp color jitter, increase the Hue. I’m going to make it 30%. This will make the brush color change slightly from the color you choose each time you stamp it on the screen. If you want more color variation, increase the slider higher. 
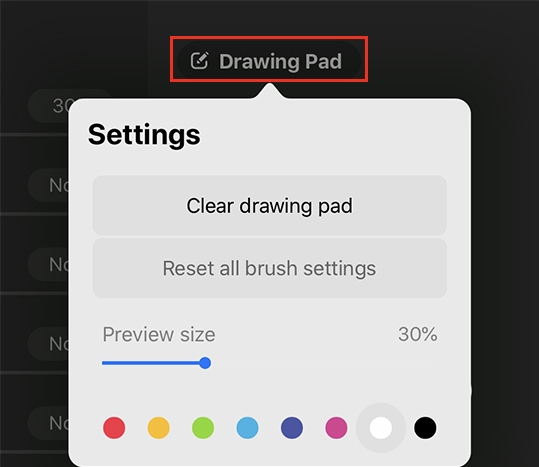
You can test the heart brush on the drawing pad. Tap Drawing Pad and then tap Clear drawing pad. Now select a color other than white or black.
Now tap the drawing pad with your Apple Pencil and stamp some hearts to test the brush.

Name the brush
When you’re happy with the settings, tap About this brush. Then tap Untitled Brush and give the brush a name such as “Heart Brush.”
When you’re done, tap Done in the upper right corner of the Brush Studio.

Test the Brush
Prepare the canvas
Tap on the wrench, tap Canvas, and toggle the Drawing Guide off.

Create a new layer and turn off the visibility of the heart layer.

Choose a color and test the brush
Get a color such as pink. I used Hexadecimal #f885e0.
Tap the canvas to stamp a heart on the canvas. Use the size slider on the side of the screen to try different sizes.

Modify the brush settings
If you want, tap on the brush to open the Brush Studio and change the brush settings.
Make more brushes
Now you can use this method to make more heart brushes. Try different heart styles and brush settings to create different brushes.
Thank you!
Thanks for visiting mapletreemakery.com. We hope you enjoyed this tutorial! Come back often for more information and tutorials.


This was amazing thanks so much, can’t wait to try it!!
Thank you!