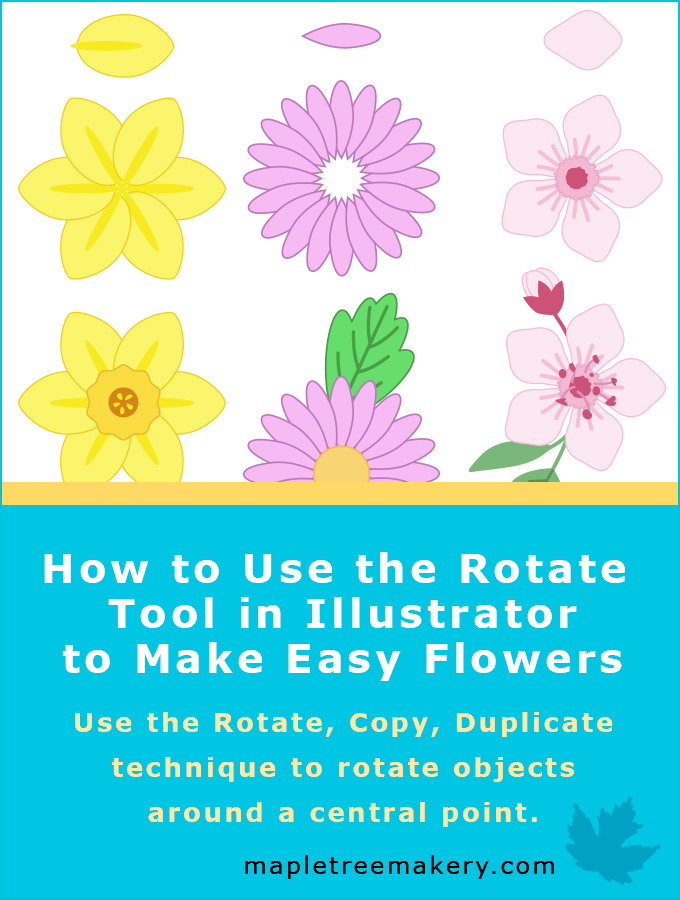
Spring has me drawing flowers in all my applications including Illustrator. Of course, there are tons of ways to make flowers in Illustrator, but I think the most fun way is to use the Rotate tool. With the Rotate tool, I can draw a single petal and use the Rotate, Copy, Duplicate technique to do the rest.
The Rotate, Copy, Duplicate technique is handy for distributing objects around a central point and rotating them incrementally at the same time! It’s an amazing technique. It can be used for lots of things. Sun rays, circular borders, mandalas, the spokes in a wheel, gears, and flowers.
Here are some examples:

If you’d like to learn how to use this technique, fire up Illustrator and follow along as I describe how to make a daisy.

Draw a Daisy
Create a new file in Illustrator. I made mine 12 inches by 12 inches so I have plenty of room to experiment. Make sure you have your Layers panel open (Window –> Layers).
Draw the daisy petal
The daisy petal is easy to draw. It’s just an ellipse with a pointed end.
Select the Ellipse tool from the toolbar or use the keyboard shortcut (shortcut: L). Draw a vertical oval roughly the size you want your petal to be.
Use the Direct Selection tool (the white arrow) to select the bottom node of the oval. Click the end of the left control handle and drag it into the bottom node. Repeat with the right control handle. Select the bottom node again and drag it downward to elongate your petal,

Rotate, copy, and duplicate the petal
Now comes the fun part. We’ll use the rotate, copy, duplicate technique to generate 19 additional petals and spin them in a circle to create the daisy.
Use the Selection tool (V) to select your newly drawn petal. In the toolbar, select the Rotate tool (R). With the petal still selected, hold down your option key (Mac) or alt key (PC) and click directly below your petal to where you think the center of the daisy would be.

The Rotate dialog box appears. This is where you set the number of degrees each petal will rotate as it spins around the center of the daisy. To determine the angle of rotation, divide 360 degrees by the total number of petals. The daisy will need 20 petals. 360 divided by 20 is 18 so the rotation angle should be 18 degrees. Here’s how to fill out the Rotate dialog box:

Once you’ve entered the 18 degrees, click the Copy button. Now you should have two petals. The new petal will show you what the degree of rotation looks like and give you an idea of the placement of subsequent petals. If you don’t like it and want to try again, delete the new petal and start over.
To add another petal, click command – D (Mac) or ctrl – D (PC) on your keyboard to duplicate your last action. You should now have three petals.

Continue to use the keystrokes to duplicate until you have all 20 petals that make up the daisy. It should look something like this:

Color the petals
Use the Selection tool to marquee around the entire daisy so all of the petals are selected and group them. (Top Menu –> Object –> Group or shortcut command – G for Mac or ctrl – G for PC.) Locate the color swatches at the bottom of the toolbar. Click the fill swatch to bring it to the front and make it active. Double-click on the fill swatch. Use the Color Picker to choose a color. Click OK.

If you want to recolor the stoke as well, click the stroke swatch to bring it to the front and make it active. Double-click the stroke swatch. Use the Color Picker to choose a color. Click OK.
My colored daisy looks like this.

Add a center
Add a simple center by selecting the Ellipse tool, holding down the shift key and drawing a perfect circle. Color the fill and stroke for the circle. I made mine yellow and gold. Use your Selection tool (black arrow tool) to drag the circle over the center of the daisy. Hold down your shift key and select both the petals and the center. Access the Align panel (Top Menu –> Window –> Align). Click the Horizontal Align Center and Vertical Align Center icons.

If the center is too small to cover the inner parts of the petals, select the center, hold down your shift key, and drag a corner of the circle to resize it. You may have to align the petals and the center again. When you’re happy with the way it looks, select the petals and the center and group them (Top Menu –> Object –> Group).
Here’s what my daisy looks like with a resized center..

Add some leaves
You can also use the rotate, copy, duplicate technique to create leaves. Select the Ellipse tool and draw a narrow oval. Select the Rotate tool. Option or alt click at the bottom center of the oval. In the Rotate dialog box, enter 15 degrees and click Copy. Click Mac: command –> D or PC: ctl–> D to duplicate the oval.

Select the middle oval and use the down arrow key on your keyboard to nudge it down. Select the left oval and nudge it down.

Hold down the shift key and select both the left and center ovals. Copy them (Mac: command – C; PC: ctrl – C). Then paste them in place (Mac: shift – command – V; PC: shift – ctrl – V). With both ovals still selected, access the Reflect panel (Top Menu –> Object –> Transform –> Reflect).

Choose the Vertical reflect option and click OK. With both the reflected ovals still selected, use the right arrow on your keyboard to nudge them in place on the right side of the center oval.

Access the Pathfinder panel (Top Menu –> Window –> Pathfinder). Select all of the ovals and click the Unite option to merge the ovals into one leaf shape.
 Finish your leaf
Use the swatches at the bottom of the toolbar to color the leaf. If you want to create some veins in the leaf, select the Pencil tool from the toolbar (Shortcut: N). At the bottom of the toolbar, click the stroke swatch to bring it to the front. Double click the stroke swatch to bring up the Color Picker. Choose a color for the veins.
Access the Stroke panel (Top Menu –> Window –> Stroke). Make the stroke size small. I used 3 pixels. set the head of the stroke to rounded. Use the pencil tool to draw the veins.

When you’re happy with your leaf’s veins, marquee around the entire leaf including the veins and group them (Top Menu –> Object –> Group). Here’s my finished leaf.

Add your leaf to the daisy
Select the leaf and position it next to your daisy. Use the Selection tool controls to resize it to fit with the daisy.

Rotate the leaf and drag it into position over the daisy. Select Top Menu –> Object –> Arrange –> Send to back to tuck it behind the daisy. Reposition it as necessary.

To create a second leaf, copy your leaf (Mac: command – C; PC ctrl – C) and paste it (Mac: command – V; PC: ctrl – V). Reflect the second leaf vertically (Top Menu –> Object –> Transform –> Reflect).

Move the second leaf into position on the left side of the daisy and send it to the back (Top Menu –> Object –> Arrange –> Send to back). The daisy is finished!

More flowers
You can make lots of different flowers using the rotate, copy, duplicate technique. All you have to do is:
- Draw the first petal
- Decide how many petals you need to create the flower
- Select the petal and option or alt click below the petal where the center of the flower would be.
- Divide 360 by the total number of petals to get the degree of rotation for each petal
- Use the Rotate panel to enter the number of degrees and click Copy
- Duplicate the petals until they create a finished circle (Mac: command – D; PC: ctrl – D)
- Add a center and leaves
Flowers I’ve tried
Cherry blossom
5 petals: 72 degrees of rotation

Daffodil
6 petals: 60 degrees of rotation

Remember flowers are just one thing you can draw using the Rotate, Copy, Duplicate technique. Use it for anything that needs to be spun around a central point.


Thank you for the nice tutorial! Can you, please, add the part about how to send the last petal in between the one before it and the first one.
Hi Alisa, I’m glad you enjoyed the article. If you use the rotate tool, set the rotation to 18 degrees and click Copy. You’ll get your first petal and now a second petal. Then use the duplicate function (command-D on Mac, ctrl-D on Pc). Click the duplicate shortcut 18 times. You should then have 20 petals in a circle without any gaps. Perhaps you didn’t use “Copy” when you used the Rotate tool. If not, you would simply rotate the original petal. You’d end up with one petal not two. And if you hit command or ctrl D, 18 times, you’d have a gap in the circle. I hope this explanation helps!